I/O Configuration
[Configuration > I/O Settings] allows you to configure the functions of the I/O ports available to users, including the digital I/O port, analog I/O port, and tool I/O port. For some controller models, safety I/O ports can be used as general I/O ports when they are not assigned with any value. Please refer to the Hardware User Manual for details.
All: Filter the display in the I/O list by signal type. Signal types include analog, digital, tool, Modbus, etc.
Action Preview: Display all I/O signals available to users.
Input: Display/set all input I/O signals available to users.
Output: Display/set all output I/O signals available to users.
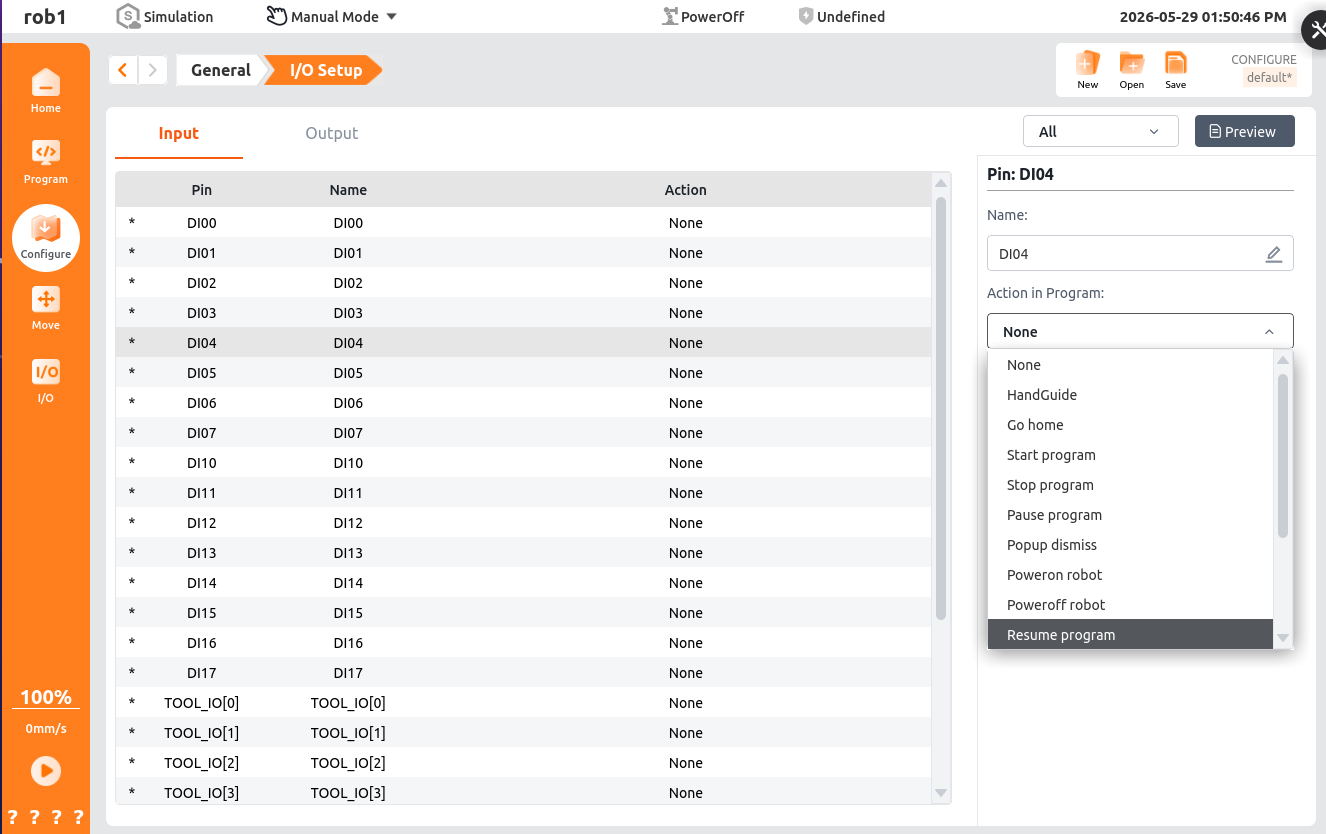
Pin: Display the interface number of the currently selected I/O signal.
Name: Display the name of the currently selected I/O. Click to rename it.
Restore Default: This button appears after renaming an I/O. Click to restore the default I/O name.
I/O Tab Control: Set whether the I/O can be manually controlled on the [I/O] tab.
- Enable: Allow manual control of this output port's signal on the [I/O] tab.
- Manual Mode Only: Only allow manual control of this output port's signal on the [I/O] tab when in manual mode (status displays "*").
- Disable: Prohibit manual control of this output port's signal on the [I/O] tab.
Action in Program: Set the action triggered when the input/output port sends a signal. Click to open a dropdown box and select a system predefined action.
Input Actions
Action Description HandGuide When triggered, the robot enters HandGuide mode, allowing the operator to manually move the robot arm. Move to Home When this signal is triggered, the robot will automatically return to the zero position or starting point along the preset path. Start Program Start the currently loaded project via an external signal. Stop Program Completely terminate the running program via an external signal. Pause Program Temporarily suspend program execution via an external signal; the robot maintains its current pose. Dismiss Popup When a prompt popup or non-fatal warning popup appears on the teach pendant interface, use this signal to remotely simulate clicking "Confirm" or "Close." Robot Power On Power on (enable) the servo motor of the robot body via an external signal. Robot Power Off Cut power to the servo motor of the robot body via an external signal (disable/power off). Resume Program When the program is in a paused state, use this signal to resume execution from the breakpoint. Start Conveyor Tracking Start the conveyor tracking function, enabling the robot arm to move synchronously with workpieces on the conveyor. Conveyor Trigger Queue (Low) Typically used to stop or exit the conveyor tracking mode. Release Protective Stop After the protective stop condition is cleared, use this signal to restore the system to normal status. Force Resume Program Typically used after a non-standard pause (such as after an alarm is cleared) to force the program to resume execution from the current position or a specified logical point. Load Program Trigger the robot to load a preset project file via an external signal (usually requires specific parameters or file names). Output Actions
Action Description Low When Program Stopped When the robot program stops executing, this port outputs a low-level signal. High When Program Stopped When the robot program stops executing, this port outputs a high-level signal. Program Running When the robot program is in execution state, this signal is active. Program Paused When program execution is temporarily suspended, this signal is active. At Home When the robot end flange or all joint axes reach the predefined home position, this signal is activated. HandGuide Indicates that the robot is currently in zero-force control mode, allowing the operator to manually drag the robot arm for teach-in. Robot Powered On When the main power of the controller is on and the servo drive is enabled, this signal is activated. Internal Emergency Stop Activated when the emergency stop condition is triggered by an internal source of the system. External Emergency Stop Activated when the emergency stop condition is triggered by external hardware connected to the safety input. System Error Activated when the controller detects a critical hardware or software fault that prevents normal operation. Non-System Error Activated when a non-critical, typically recoverable error or warning condition is detected. Robot Operable Activated when the robot is fault-free, powered on, and in a state where it can accept control commands. Operation Mode Indicates the current operating mode of the robot controller. Safety Stop Activated when a controlled stop triggered by a configured safety function occurs. Distinct from emergency stop. Protective Stop Activated when an external protective device connected to the system triggers the stop mechanism. Program Unexpected Stop When a running program is aborted due to an internal logic error, runtime exception, or external interference, this signal is activated.